Labels

Monday, March 17, 2014

Irish Egg Rolls (corned beef, cabbage, potatoes and carrots)


If you're Irish like I am (and even if you're not) there's a good chance you may have had corned beef and cabbage recently since today is St. Patrick's Day.

And if you make large quantities of food like I do, then there's an equally good chance that you have plenty of leftovers (we actually plan it that way because we enjoy them almost as much as the first time we serve it).

If that's the case, you may be wondering exactly what to do with some of those leftovers. I'm here to help!

I usually either just heat them up as is, make reuben sandwiches or chop them up to make hash (I can't stand the hash from a can - it looks and tastes too much like dog food) but it's awfully good when it's made from scratch.


I wanted to try something a little different this time around - and I've been making eggrolls recently so I decided to combine the two.

They came out fantastic. My son loves the corned beef and the potatoes but refuses to eat the cabbage and carrots so I wasn't certain how he'd react to the eggrolls with all of the above in them. I was more than pleasantly surprised when he told me (repeatedly) how much he loved them and that he'd REALLY like for me to make them again.

We used thousand island dressing as a dip which really gave them the flavor of a crunchy reuben.  If you don't happen to have any on hand, you can do what we did and make your own by combining catsup, mayo and a bit of pickle relish.

Keep in mind that you can also make this with packaged corned beef (or some from the deli) if you want to try it and don't have any leftovers to use.  You can also make it with or without any of the other ingredients - don't like cabbage?  Leave it out. Same thing with the carrots or the potatoes. I used all of it but it's certainly not necessary. Likewise, I'm listing the amount of leftovers I used but you can use more or less depending upon how much you have or simply how many eggrolls you want (the recipe below made about 15).

Finally, I use the eggroll wrappers that you find in a Asian market as opposed to the ones that you find in your local supermarket.  Both will work, but the ones you find in a supermarket are far more "bubbly", aren't as crispy and are "chewier".  Conversely, the ones in an Asian market are MUCH crispier, very smooth and have a wonderful "crunch".

These are the wrappers I prefer to use, but any will work

If you try them, let me know what you think!

Ingredients

  • 1 pound cooked corned beef
  • 1 1/2 cups cooked cabbage
  • 3 small cooked potatoes, diced
  • 4 small carrots, diced
  • 2 ounces Swiss cheese, diced
  • 1 small onion, diced
  • 2 cloves garlic, minced
  • 1 tbsp butter
  • 12-15 egg roll wrappers
  • 1 tbsp cornstarch
  • 1/2 cup water
  • oil for frying
  • salt and pepper to taste

Directions

  1. Mix corned beef, cabbage, potatoes and carrots in a bowl
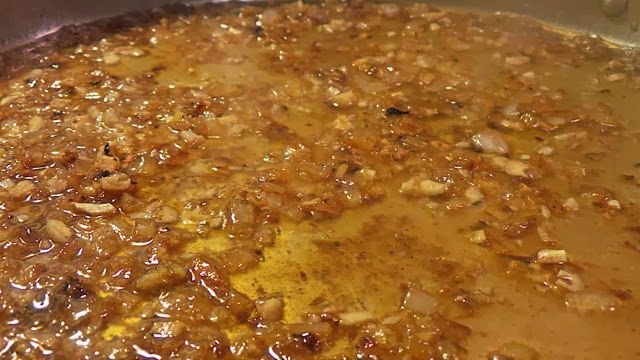
  2. Melt the butter in a skillet and then sauté diced onion until soft and just starting to brown (about three minutes)

  3. Add minced garlic and sauté until fragrant (about two minutes) 

  4. Add the corned beef, cabbage, potatoes and carrots to the skillet and cook, stirring occasionally until heated throughout

  5. Season to taste with salt and pepper
  6. Remove from heat and set aside
  7. Mix the water and cornstarch well
  8. Place the eggroll wrapper on the counter with one corner pointed towards you

  9. Add about 2 tbsp filling and a bit of Swiss cheese on top of the wrapper

  10. Start rolling the wrapper up and around the filling. It's very important to wrap as tightly as you can. 

  11. Fold the right and left corner to the center

  12. Roll towards the remaining corner but stop just before you get to the end

  13. Brush the tip with the cornstarch water mix using a pastry brush (if you don't have one, your fingers will work)

  14. Continue rolling and then lightly press the edges to seal

  15. Repeat steps 8 through 14 until you use up all of your filling (or your wrappers)
  16. Heat oil to 375° F

  17. Fry for 2-3 minutes until golden brown

  18. Drain the egg rolls on a cooling rack with paper towels until cool enough to serve

  19. Serve with thousand island dressing or your favorite mustard
  20. Enjoy!

NOTE:  You can actually make these and freeze them to cook later. Simply place a sheet of parchment paper on a cookie sheet and put the eggrolls on top of them (make certain they are not touching). Place in the freezer for a couple of hours until they are frozen solid, then place them in a freezer bag and pull them out when needed and fry in 375 degree oil until golden brown.

Sunday, March 2, 2014

The BEST chocolate chip cookies ever!! (no, really - you have to try them!)


I'm not entirely sure why, but when I think of cookies, I ALWAYS think of chocolate chip cookies.  I like most all kinds, but there's no doubt which ones are my favorite.

I also am aware that lots of people think theirs are the best.  And the title of this posting may be a bit of hyperbole because it's entirely possible they aren't the best...but I'm betting they're pretty darned close!

So, what makes them so good? I'd have to say it's really two things; the steps to create them and the addition of a bit of cinnamon and nutmeg.  I know that you won't find many chocolate cookie recipes with either of those ingredients, but it DOES make a difference.  I guess you'll have to try it yourself to really know for certain!!

Ingredients

  • 1 cup (2 sticks) butter, softened 
  • 1/2 cup sugar
  • 1 1/2 cup packed brown sugar
  • 2 eggs, beaten 
  • 2 tsp vanilla (double strength if you have it available)
  • 2 3/4 cups (12 oz) all ­purpose flour (if at all possible, weigh the flour to be certain you have the correct amount) 
  • *3/4 tsp ­medium coarse sea salt
  • 1 tsp baking soda
  • 1 1/2 tsp baking powder
  • 2 tsp cinnamon
  • 1/2 tsp nutmeg
  • 2 cups dark chocolate chips (I actually use one cup dark chips and one 3.5 oz Lindt Dark Chocolate "A Touch of Sea Salt" bar cut into small chunks)
​NOTE

*If possible, use sea salt and not table salt. You will get much better flavor (and texture) that way. If you only have table salt, use 1/2 tsp. ​

Instructions

  1. Preheat oven to 350 degrees
    Butter, sugar, brown sugar, cinnamon and nutmeg
  2. Cream butter, sugar, brown sugar, cinnamon and nutmeg (approx. 3 minutes on medium­/high speed on a Kitchen Aid Mixer)
    This is what it should look like after properly creaming the butter and sugars
  3. Add eggs and vanilla and beat for an additional 2 minutes
    After adding the eggs and vanilla and beating together
  4. Add baking soda, baking powder, salt, and flour. Mix until just incorporated (don't over mix at this point)
    Add the flour, baking soda, baking powder and salt
  5. Add chocolate chips and stir until well distributed. The batter should be fairly thick
    I use half chips and half cut up dark chocolate bar.  This is a Lindt
    dark chocolate "A Touch of Sea Salt" bar chopped into small pieces
  6. At this point, I put the batter in the refrigerator to chill for a minimum of an hour but preferably overnight. It's not an absolutely necessary step but it DOES make a difference in the texture of the cookie

  7. Remove from the refrigerator and drop about 2 tbsp of dough onto a baking sheet lined with parchment paper
    My brother and son enjoying making cookies together
  8. Bake for 12-­14 minutes until the edges are nice and golden brown 
  9. Remove from oven and allow to cool on the cookie sheet for about two minutes 
  10. Pick up the parchment paper with the cookies still on top and transfer to a cool non­porous surface (I put a cookie sheet in the freezer to chill and take it out and put them on that. They cool very quickly that way. I actually use two cookie sheets to bake on and keep two in the freezer and swap them back and forth)
    My brother and son - they were very
    proud of  the cookies they made!
  11. Allow the cookies to cool on the paper for at least 3 minutes before serving
  12. Enjoy! 

Thursday, February 20, 2014

Pork Tacos - or a poor man's version of Tacos al Pastor


Have you ever made a pork roast and had leftovers and didn't know what to do with them? Well, I'm here to tell you what we do with ours - and that sometimes we make an entire pork roast just so that we can have these tacos.

First, what are tacos al pastor?

Tacos al pastor likely originated from Lebanese immigrants who made their way to Mexico and brought shawarma with them. Like any food that emigrates from one place to another, changes are made to include locally available ingredients and to suit local palettes. In this case, the meats were flavored with various chiles and then topped with a pineapple while roasting. Both tacos al pastor and schawarma are marinated meats that are placed on a vertical spit that is rotated alongside a source of heat and then thinly sliced as the meat cooks (I was also reminded of the meat you may have seen if you've ever ordered a gyro). Schawarma can be lamb, chicken, turkey, beef, veal, or even mixed meats, but tacos al pastor are pork.

We heard of them for the first time when we were in Puerto Vallarta a few years ago. They were selling them from a little cart so we decided to indulge and try them, not really expecting much. Boy, were we wrong. They were delicious! We had them again (several times) when we were in Cancún three years ago and order them at the few local restaurants here that have them (though none can equal what we had in Mexico).

My version isn't terribly complicated - it's actually very simple but still has a very similar flavor and has been very popular with everyone that has tried it.

When we were in Cancún it was served with a number of items on the side to top them with: fresh pineapple, cilantro, and thinly sliced cabbage and onions (as well as cheese, sour cream and fresh limes). As odd as topping your tacos with pineapple or cabbage may sound, the mixture of the spices in the meat and the sweetness of the pineapple is incredible. The cabbage adds a bit of "crunch" and the cilantro really completes it. But what really makes it special is the pork itself - I cook mine on a rotisserie which leaves it crispy on the outside. When you then put the leftover pork and some spices in a skillet and brown it, it gets nice and crispy and melts in your mouth.

So, here is my version of tacos al pastor! I'm writing this up for two pounds of leftover roast, simply because that's what I had.  You can very easily adjust the seasonings for whatever amount you may have available.

Ingredients


  • 2 pounds leftover pork roast, chopped into small pieces
  • 2 tbsp olive oil
  • 1 small onion, diced
  • 3 cloves garlic, minced
  • 2 tsp freshly grated ginger
  • 1 tbsp chili powder
  • 1 tbsp ground cumin
  • 1 tsp onion powder
  • 1 tsp garlic powder
  • flour or corn tortillas (corn are traditional)


Toppings (all optional)


  • pineapple (fresh is best but canned will work fine)
  • cilantro, rough chopped
  • cabbage, thinly sliced
  • onions, thinly sliced
  • shredded cheese
  • sour cream
  • fresh lime, quartered for squeezing over tacos
  • guacamole


Directions


  1. Pour 1 tbsp olive oil into a heavy skillet on medium high heat (I prefer cast iron for this)
  2. Put the leftover roast in the pan with the oil and heat thoroughly
  3. While heating the pork, place another pan on medium heat. Add the remaining oil and sauté the onions until just soft. Add the garlic and ginger and sauté for an additional two minutes and set aside
    Onions, ginger and garlic ready to be added to the pork
  4. Stir the chili powder and cumin into the roast
    The pork with the chili powder and cumin added
  5. Continue cooking, stirring occasionally until edges of the pork get crispy and brown
    The pork with the onion, garlic and ginger browned and ready to go
  6. Add the onion/garlic/ginger mixture to the pork and mix well
  7. Remove from heat and serve with whatever toppings you prefer!

Sunday, February 16, 2014

Instant Hot Chocolate Mix


Instant Hot Chocolate Mix - topped with homemade maple whipped cream and caramel sauce

My son drinks a lot of hot chocolate and since the K-cups for the Keurig machine aren't particularly cheap, I decided it was time to figure out how to make a mix that would do the same thing, taste better and be a LOT cheaper.  I also had enough interest in my posting for instant chai mix that it warranted an encore of sorts so I thought this would kill two birds with one stone.

How does it taste?  I'll let my son do the honors, and this is a direct quote from him when he tasted it the first time, "Holy crap Dad - this stuff is REALLY good.".  An eloquent man of few words, my son.

He then had two more cups.

That's how I always know that I have a winner.

Ingredients


This is a 32 oz jar. You can see this recipe makes enough to fill
the jar. If you'd like more it can easily be doubled (or tripled!).


Directions

  1. Pour all ingredients into a food processor
  2. Blend until mixture is the consistency of fine powder  (you can skip this step and simply mix by hand, but it will dissolve better if you take the time to do it)
  3. Top with whipped cream or mini-marshmallows
To serve: Stir two or three tablespoons of the hot chocolate mixture (depending upon taste) into a mug of hot water. If you prefer an even creamier consistency, you can add hot milk instead of water.

Tropical Chicken


"Tropical chicken. What is that? Really? You're stuffing chicken with bananas?"

I'm paraphrasing, but that's basically how the conversation started out when my son asked what I was making for dinner. I'm certain he isn't the only person that has those same feelings when hearing what this recipe entails.

When he tried it he had an insight that I thought was brilliant because I hadn't thought of it earlier: it's very similar to chicken cordon bleu - except that instead of being stuffed with ham and cheese, it's stuffed with prosciutto (a type of ham) and bananas. He REALLY liked it - and I think you will, too.

The first time I ever heard of this dish was when I was in Cancun. We went to a wonderful restaurant (La Habichuela) and sat in the beautiful open courtyard with flowers growing everywhere and opened a very eclectic menu.

One of the things that caught my eye was called
Chicken Breast Verónica at La Habichuela in Cancún 
"Chicken Breast Verónica".  This is the description from their menu: "Stuffed with banana and prosciutto in a sweet hawaiian sauce".  I decided to try it and was VERY glad I did.  Though I really didn't know what to expect, it tasted incredible. The bananas had such a creamy, sweet taste that it really complemented the savory taste and crispy texture on the outside of the chicken. Likewise, the "sweet hawaiian sauce" over the chicken and rice also complemented the chicken well.

Try as I might, I wasn't able to find this recipe (or one similar) anywhere so I decided to try it myself. I've basically made the chicken the same way every time but I've experimented quite a bit with the sauce.  I've made one that had more of a maraschino cherry base (too sweet) and one that was ONLY fruit based (also too sweet).  The one I finally settled on uses wine, chicken broth and fruit and, in my opinion, is sweet enough without being TOO sweet like the other versions.

I'd rather have you be the judge though.  Try it and see what you think.  I think you'll be glad you did.


Ingredients


For the chicken:
Start with a whole boneless, skinless chicken breast

  • 2 boneless skinless whole chicken breasts
  • salt and freshly ground black pepper
  • 2 small bananas, peeled and sliced
  • 4 slices prosciutto
  • 2 tbsp butter
  • 2 tbsp olive oil
  • 1/2 cup flour for dredging chicken
  • 2 eggs, beaten
  • 2 tablespoons milk (beat with the egg)
  • 1/2 cup panko (or other bread crumbs) for dredging chicken

For the sauce:
  • 8 oz can crushed pineapple 
  • 8 oz can pineapple chunks
  • 2 mangos, peeled and diced
  • 1 cup orange juice
  • 1 small onion, diced
  • 1 tbsp minced garlic
  • 1 tbsp minced ginger
  • 1 cup white wine
  • 1 cup chicken broth
  • 2 cups cooked rice (white, long grained or brown, whichever you prefer)
  • maraschino cherries for garnish

Preheat oven to 350

Directions

  1. Cut one of the chicken breasts almost in half and open it up like a book so you form a butterfly shape

  2. Place a piece of plastic wrap over the chicken and using a heavy skillet or mallet, pound to even out their thickness and make them thin

  3. Cut in half to make two pieces
    Before cutting in half to make two pieces
  4. Repeat steps 1-3 for the second breast. You should end up with four pieces of thinly pounded chicken
  5. Lightly salt and pepper each chicken breast (feel free to use other spices/herb if you like. I used some freshly ground rosemary and garlic powder in addition to salt and pepper)

  6. Take a slice of prosciutto and stack banana slices inside and carefully roll up

  7. Place the prosciutto/banana on the pounded piece of chicken and carefully roll up, enclosing the prosciutto/banana

  8. Wrap each stuffed chicken piece in plastic and refrigerate for an hour or more

  9. Put the mango, orange juice and the crushed pineapple in a saucepan and bring to a boil. Reduce to a simmer and let cook for 15 minutes

  10. Puree the mango, pineapple and orange juice mixture using a food processor, blender or immersion blender and set aside 
  11. Set up three pans; one with flour, one with the beaten egg and milk mixture and one with the panko or bread crumbs

  12. Remove the chicken from the refrigerator and dredge each piece through the flour, then the egg/milk mixture and finally in the panko/bread crumbs

  13. Heat the butter and olive oil in a skillet over medium heat
  14. Brown the chicken on all sides being careful while turning it not to let the bananas come out of the ends

  15. Place the chicken in an oven safe dish and place in the preheated oven (at 350)

  16. Bake for twenty minutes or until the chicken is just cooked through
  17. While the chicken is baking, put the onions in the skillet where you cooked the chicken
  18. Sauté the onions until they are getting soft
  19. Add the garlic and ginger and sauté for two minutes
  20. Add the wine and reduce by half

  21. Add the chicken broth and the mango/pineapple/juice mixture to the pan along with the can of pineapple chunks and bring to a boil

  22. Reduce the heat to a simmer and cook for ten minutes
  23. Remove the chicken from the oven
  24. Mound some cooked rice in the middle of each plate and top each with a piece of chicken
  25. Spoon the sauce generously over the chicken and rice
  26. Top with a maraschino cherry for a garnish!


If you prefer your sauce a bit sweeter, feel free to add honey or brown sugar during the cooking stage (step 21)