Labels

Monday, February 26, 2018

Black Garlic Ranch Pork Chops


This recipe is as easy as you want to make it.  There are (many) versions of it out there that are incredibly simple.  This one is a bit more complicated, though still easy.  As I go through the steps, I'll tell you which ones you can easily skip and which you can't.  The prep can take anywhere from about two minutes to 30-45 minutes (including all prep time for chopping vegetables, etc).  It all depends on how much time you want to spend and how you want it to taste.  The more time you invest, the better it will be.  However it will be good even with the minimal two minute prep time.

Let's start with the basics of this recipe.  Most versions I've seen of this on the web call for the pork chops, a can of cream of chicken soup and a package of Hidden Valley Ranch Dressing mix.  That's it.  Put the pork chops in the crock pot, pour the can of soup on top then sprinkle on the dressing mix.  That's all there is to most of these recipes.

As much as I like simple, I also like great flavor.  I'm going to walk you through how to take this from a good flavor to a fantastic flavor.  Part of that involves swapping out the Hidden Valley Ranch for Grandpa's Best Black Garlic Ranch Seasoning and Rub.

It involves several more steps and a few more ingredients.  As I mentioned earlier, you can skip some of these steps and ingredients.  They really are optional.  Adding the extra steps may seem like it's a bit counterintuitive since one of the reasons for using a crockpot is simplicity; but I assure you the additional steps are worth the extra time they take.

Having said all that, here's the recipe and you can decide for yourself.


Ingredients


  • 2 tbsp olive oil
  • 4 pork chops
  • 1 can cream of chicken soup (or cream of mushroom soup)
  • 1 package Grandpa's Best Black Garlic Ranch Seasoning & Rub
  • 1 cup flour*
  • 5 oz sliced mushrooms (my preference is portobello but whatever you like will work)*
  • 1 medium onion, diced*
  • 1 cup white wine*
  • 4 cloves garlic (minced)*
  • salt, pepper, garlic powder to taste*
      *optional


Portobello mushrooms

I LOVE this tool.  It allows you to very quickly prep your garlic.  It's called a
"garlic rocker".  Since I use a lot of garlic when I cook, it saves me an
 enormous amount of time.  If you're interested, you can see it here.

Onions diced and garlic minced


Directions


  1. Season pork chops with salt, pepper, and garlic powder to taste (I always brine my pork chops, typically overnight.  This isn't a necessary step although it definitely makes them much more tender and adds a great flavor.)

    Seasoned pork chops
  2. Coat the pork chops with flour on both sides (optional step).


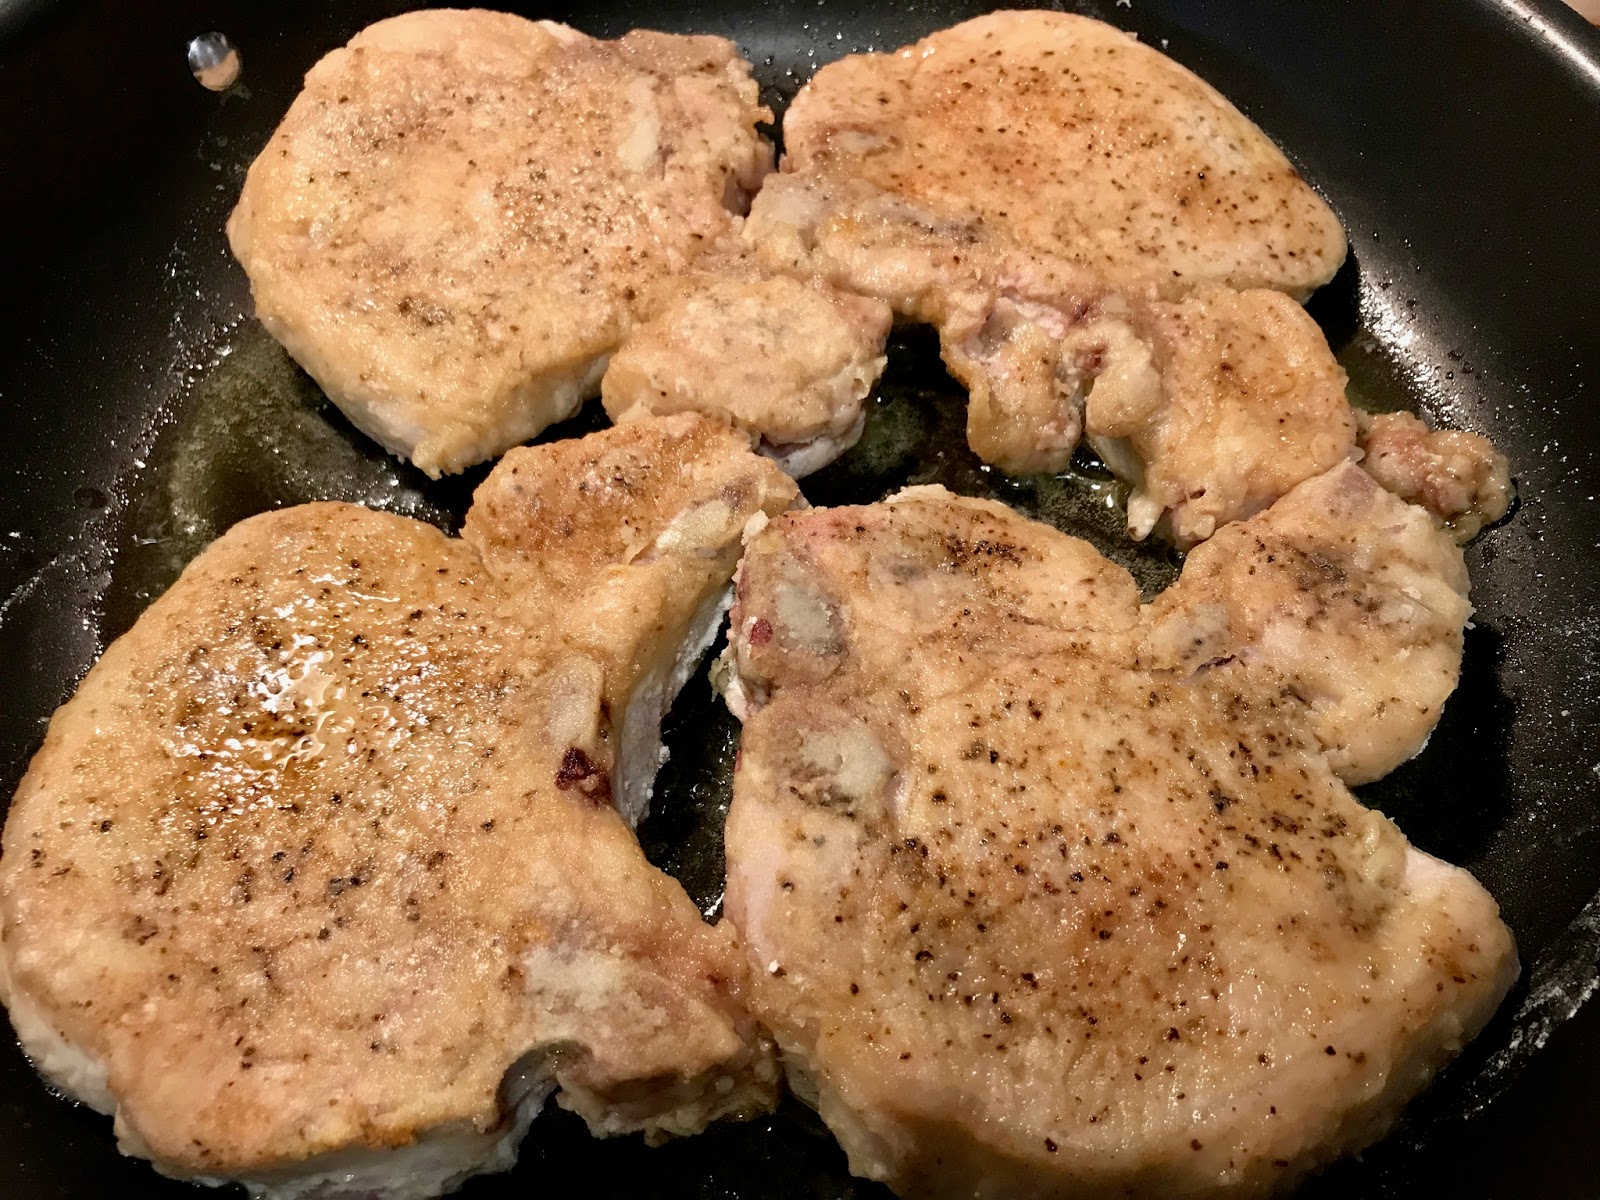
  3. Brown the pork chops in the olive oil (optional step).


  4. Put the pork chops in the crock pot (I use a liner; it makes clean up MUCH easier.  Liners available here).

  5. Sauté the onions and mushrooms in the pan you used for the pork chops.  If there isn't enough oil, feel free to add more as needed.  You want to cook them until the onions are just getting soft and the mushrooms have started to create their own liquid.  This should take about 3-4 minutes (optional step).

  6. Add the garlic and cook until fragrant, about 30 seconds (optional step).

  7. Add the wine and turn up the heat.  You want to reduce the amount of liquid by about half (optional step).

  8. When the liquid has been reduced, add the cream of chicken (or cream of mushroom).  Mix everything together.

  9. Add the Grandpa's Best Black Garlic Seasoning and Rub mix and again stir everything together.


    After stirring in the Black Garlic Ranch mix

  10. Pour the mixture over the pork chops.

  11. Put the lid on the crock pot.
  12. Cook for six hours on low or four hours on high.


  13. When they are done, remove the pork chops and stir everything else together.

  14. Serve over egg noodles or mashed potatoes.

  15. Enjoy!
         
          Here you can see just how tender these are.  They are literally falling apart.


Saturday, February 3, 2018

EZ Apps: Pizza Roll-ups


I love making these pizza roll-ups.  They are incredibly versatile. You could also fill them with Mexican style ingredients such as hamburger or shredded chicken with appropriate seasoning, cheddar cheese, etc.   You can even stuff them with chopped corned beef, potatoes and cabbage for an Irish feel.

In this recipe, I'm going to give you directions for making a simple marinara out of tomato sauce.  However,  you can just as easily use a canned spaghetti sauce.   Jarred sauce will definitely save you time though making it from scratch is pretty simple as well.

The possibilities for these roll-ups are truly endless.  If you prefer pepperoni, throw some in.  Hamburger along with mushrooms and green peppers?  Why not?

You can even make these vegetarian if you'd like.  Simply leave out the meat and use the cheese and whatever vegetables you'd like.  Throw in some of the frozen vegetable crumbles (meat substitute), and if you add Penzey's Italian Sausage seasoning, it will taste just like Italian sausage.  I know this from experience.

Just substitute whatever you'd like for the insides and it will be excellent.


Ingredients*


  • 1 tbsp vegetable oil
  • 1 lb Italian sausage (mild or spicy, your choice)
  • 2 cups shredded mozzarella cheese
  • 8 flour tortillas (8 inch)
  • 1 egg, beaten
  • 1 tbsp sesame seeds (optional)
      Marinara
  • 16 oz tomato sauce
  • 3 tablespoons butter
  • 3 tablespoons extra-virgin olive oil
  • 4 cloves garlic, finely minced
  • pinch red pepper flakes (optional)
  • 1 teaspoon dried oregano
  • 2 tsp dried basil 
  • pinch of kosher salt
      OR
  • 2 cups your favorite spaghetti sauce

*Cook's note:  I used the eight inch tortillas and only had eight of them in the package.  I could have easily made 10-12 of these with the rest of the ingredients, then cut them in half to serve.  If you choose to use the smaller size tortillas it will make quite a few more.  Likewise, if you use the larger tortillas it will make less but you can cut them up into smaller pieces to serve.


Directions

  1. Preheat the oven 350° F.


  2. Cook the Italian sausage until it's well browned.  Set aside.


  3. Melt butter in a small saucepan.  Add olive oil.  Add garlic and cook until garlic is soft (about 30 seconds to one minute). Remove from heat and add tomato sauce, red pepper flakes (if using), oregano, basil and salt.  Mix well to completely combine.  THIS STEP IS OPTIONAL.  IF YOU ARE USING PREMADE SPAGHETTI SAUCE, SKIP THIS STEP.


  4. Take a tortilla and using a brush, paint one edge of the tortilla with the egg wash.  This will help the tortilla stick together when you roll it up.


  5. Place about two tablespoons of the Italian sausage on the lower edge of the tortilla (opposite side of where you put the egg wash).


  6. Put two to three tablespoons of mozzarella cheese next to the sausage.


  7. Pour approximately two tablespoons of sauce on top of the cheese.


  8. Roll the tortilla up into what looks like a small log.  The area where you used the egg wash will help it stick together.


  9. Brush the top with the remaining egg wash and sprinkle with sesame seeds.


  10. Line them all up on a lined backing sheet and bake for around 20 - 30 minutes until crisp and golden.


  11. Dip in marinara sauce and enjoy!

EZ Apps: Deep Fried Mac & Cheese


When I'm looking for appetizers, whenever possible I go for simple.  It has to taste good, but simple is one of the first criteria.  This is particularly true if it's a day that I'm making multiple types of appetizers.  I don't want to spend my entire day on them and then have to make my main meal, dessert, or whatever else is going along with it.

That's where this particular appetizer shines.  It's incredibly simple.  It starts with something that you make the day before (or three or four days before): mac & cheese.  The best part about that is that it can be any type of mac and cheese you like.  Are you like me and you prefer to make it from scratch? Good.  That works.  How about the good old blue box of Kraft?  Yup, it works just fine as well.  As long as it's a mac and cheese that you like, it will work just fine.

Why the day before?  That's easy.  You want it to be well chilled so it holds its shape.  You can certainly make it in the morning and then refrigerate it before making the appetizer later in the day.

These are SO much better than any I've ever had in a restaurant.  You have to give them a try!


Ingredients


  • Refrigerated, leftover mac & cheese (How much you use is completely up to you. The amount of egg and panko mixture in the recipe is enough to make approximately two dozen mac & cheese balls.  You can opt to make your balls a bit smaller or a bit larger. Again, this is up to personal preference.)
  • 1 cup panko bread crumbs
  • 1/2 cup parmesan cheese
  • 1/4 tsp salt
  • 1 tsp rosemary leaves (optional)
  • 1 tsp thyme leaves (optional)
  • 1 tsp garlic powder (optional)
  • 1/2 tsp onion powder (optional)
  • 2 eggs, beaten
  • 2 tbsp milk
  • oil for frying


Directions


  1. Heat the oil to 325 degrees.  For most frying, I heat it to 350-375.  I found that with this, you want it a bit lower.  If you use the higher temperature the outside will brown and even burn before the inside heats up.
  2. While the oil is heating up, put the dry ingredients (panko, parmesan cheese, salt, and any herbs/spices you choose to use) in a food processor and pulse a few times until fine.  Feel free to add any herbs/spices you might like to this mixture.  If you like an Italian herb flavor, throw in a bit of oregano, basil and thyme.  You can personalize this to your tastes.  Set aside.
  3. Mix the egg and milk together and set aside.


  4. Form the cold mac and cheese into balls.  You want the balls to be about 1 1/2 tbsp in size. I use a medium cookie scoop for this (available here), which helps ensure consistency.  Set aside.
  5. Roll the mac & cheese balls in the egg/milk mixture.


  6. Next roll the balls in the panko mixture and set aside.


  7. Carefully place the balls a few at a time into the oil.  You don't want to crowd them.  They should take approximately three minutes to cook at 325.  They will be a golden brown color.


  8. Remove from oil.  IMPORTANT: Let cool before biting into them.  They WILL be very hot!
  9. Eat as is or use your favorite dip (we love it with our Smoky Southern Gold sauce).


Sunday, January 28, 2018

Easy Crockpot Ribs


Before I go any further, I need to clarify something.  I have a smoker - multiple smokers actually.  I also have multiple grills.

So, you may (rightfully) ask, why am I cooking ribs in a crockpot?

Excellent question.  There are multiple parts to the answer:
  1. Weather.  Sometimes the weather just doesn't want to cooperate.  I'm not fond of cleaning off the snow to use my outside equipment.  Same holds true with rain.  I'll use the smoker/grill when it's lightly raining but not when it's pouring.
  2. Convenience. There are times when it's just easy to pop the ribs in the crockpot and walk away for awhile. 
  3. The number one reason? I have a cooking blog and I know not everyone is as lucky as me and has a smoker. 
Also, since I have a small BBQ sauce company on the side, I'm frequently asked by customers how they can make ribs to use our sauces and rubs WITHOUT a smoker.

This is one way to do it.  I know there are several recipes out there.  Some use root beer, some use Dr. Pepper, yet others use fruit jams.  This one uses apple juice.  Oh yeah, and BBQ sauce.

Of course, I'd love you to use my BBQ sauce, but the truth is that any sauce you like will work.  If you should want to try our sauce, you can find it here.

And for the inevitable question, do they taste as good as using a smoker?  In my opinion, no.  BUT (and it's a huge but) you can make them without having to invest in an expensive piece of equipment you may have no interest in or no place to put.  They also have the advantage of being very good, simply without the added smoke flavor.

Now, on to the recipe.


Ingredients

  • 1 rack pork ribs (2-3 pounds)
  • 2-3 tbsp rub* (I use my Pork and Poultry Rub, but any rub you like will work.)
  • 1 cup apple juice
  • 1 1/2 cup BBQ sauce (For this, I used our Sweet and Mild sauce.  We have 11 sauces available ranging from mild to very hot.  You can use any sauce you like and it will work fine.)
*If you prefer, you can use salt and pepper instead of a rub.  Simply sprinkle however much you'd like on both sides of the ribs in place of the rub.

Directions

  1. Turn the broiler on in your oven to preheat.  
  2. Ribs frequently have a membrane on one side.  You can choose to leave this on if you'd like, but I always remove it.  It helps the rub to penetrate the meat and gives a better flavor.  To remove it, the best way is to grab one edge of it and simply pull it off.  It can be difficult to grab but it's much easier if you use a paper towel.  If you make a lot of ribs, you can actually purchase a tool that will make the job of removing the membrane much easier.

    Membrane on the ribs
    Tool for removing membrane.  Grabbing with a paper towel works just fine.
  3. After you remove the membrane you can trim the ribs if you choose.  There will be no difference in taste either way.

    Ribs trimmed and ready to be rubbed.  Trimming is NOT necessary
    The meat that was trimmed off is above and to the right and will also be cooked
  4. After you trim the ribs (optional), you are ready to use your rub.  Simply sprinkle a fairly heavy coating on both sides of the ribs and rub it into the meat.  If you prefer to use salt and pepper instead, do the same thing with it.


  5. Put the ribs on a lipped pan.  You can use a sheet of parchment paper or foil to line it to facilitate cleanup if you'd like.
  6. Put the pan in the preheated oven for five minutes.
  7. Flip the ribs over for an additional five minutes.


  8. If you use a crockpot liner, this is the time to put it in.  If you'd like to try one, you can find them here
  9. Pour the apple juice in the crockpot (with or without the liner).
  10. Remove the ribs from the oven.
  11. Put the ribs in the crockpot with the apple juice. You may have to cut the ribs for them to fit, depending upon the size of your crockpot.
  12. Pour one cup of BBQ sauce over the ribs.


  13. Cover the ribs and cook on HIGH setting for four hours.  You can cook them for 6-8 hours on low if you prefer.  If you do, the texture of the meat will become somewhat "mushy" though the taste will be the same.


    Ready to come out of crockpot
  14. After the four hours is up, carefully remove the ribs and place on a lipped pan.
  15. Turn the oven to 350.
  16. Using the 1/2 cup of BBQ sauce you have left, spread it over both sides of the ribs.


  17. Put the ribs in the oven for about 15-20 minutes.  This will "tighten" up the sauce and give them a wonderful flavor and a better appearance.


  18. Remove the ribs from the oven and serve.