Labels

Sunday, February 16, 2014

Tropical Chicken


"Tropical chicken. What is that? Really? You're stuffing chicken with bananas?"

I'm paraphrasing, but that's basically how the conversation started out when my son asked what I was making for dinner. I'm certain he isn't the only person that has those same feelings when hearing what this recipe entails.

When he tried it he had an insight that I thought was brilliant because I hadn't thought of it earlier: it's very similar to chicken cordon bleu - except that instead of being stuffed with ham and cheese, it's stuffed with prosciutto (a type of ham) and bananas. He REALLY liked it - and I think you will, too.

The first time I ever heard of this dish was when I was in Cancun. We went to a wonderful restaurant (La Habichuela) and sat in the beautiful open courtyard with flowers growing everywhere and opened a very eclectic menu.

One of the things that caught my eye was called
Chicken Breast Verónica at La Habichuela in Cancún 
"Chicken Breast Verónica".  This is the description from their menu: "Stuffed with banana and prosciutto in a sweet hawaiian sauce".  I decided to try it and was VERY glad I did.  Though I really didn't know what to expect, it tasted incredible. The bananas had such a creamy, sweet taste that it really complemented the savory taste and crispy texture on the outside of the chicken. Likewise, the "sweet hawaiian sauce" over the chicken and rice also complemented the chicken well.

Try as I might, I wasn't able to find this recipe (or one similar) anywhere so I decided to try it myself. I've basically made the chicken the same way every time but I've experimented quite a bit with the sauce.  I've made one that had more of a maraschino cherry base (too sweet) and one that was ONLY fruit based (also too sweet).  The one I finally settled on uses wine, chicken broth and fruit and, in my opinion, is sweet enough without being TOO sweet like the other versions.

I'd rather have you be the judge though.  Try it and see what you think.  I think you'll be glad you did.


Ingredients


For the chicken:
Start with a whole boneless, skinless chicken breast

  • 2 boneless skinless whole chicken breasts
  • salt and freshly ground black pepper
  • 2 small bananas, peeled and sliced
  • 4 slices prosciutto
  • 2 tbsp butter
  • 2 tbsp olive oil
  • 1/2 cup flour for dredging chicken
  • 2 eggs, beaten
  • 2 tablespoons milk (beat with the egg)
  • 1/2 cup panko (or other bread crumbs) for dredging chicken

For the sauce:
  • 8 oz can crushed pineapple 
  • 8 oz can pineapple chunks
  • 2 mangos, peeled and diced
  • 1 cup orange juice
  • 1 small onion, diced
  • 1 tbsp minced garlic
  • 1 tbsp minced ginger
  • 1 cup white wine
  • 1 cup chicken broth
  • 2 cups cooked rice (white, long grained or brown, whichever you prefer)
  • maraschino cherries for garnish

Preheat oven to 350

Directions

  1. Cut one of the chicken breasts almost in half and open it up like a book so you form a butterfly shape

  2. Place a piece of plastic wrap over the chicken and using a heavy skillet or mallet, pound to even out their thickness and make them thin

  3. Cut in half to make two pieces
    Before cutting in half to make two pieces
  4. Repeat steps 1-3 for the second breast. You should end up with four pieces of thinly pounded chicken
  5. Lightly salt and pepper each chicken breast (feel free to use other spices/herb if you like. I used some freshly ground rosemary and garlic powder in addition to salt and pepper)

  6. Take a slice of prosciutto and stack banana slices inside and carefully roll up

  7. Place the prosciutto/banana on the pounded piece of chicken and carefully roll up, enclosing the prosciutto/banana

  8. Wrap each stuffed chicken piece in plastic and refrigerate for an hour or more

  9. Put the mango, orange juice and the crushed pineapple in a saucepan and bring to a boil. Reduce to a simmer and let cook for 15 minutes

  10. Puree the mango, pineapple and orange juice mixture using a food processor, blender or immersion blender and set aside 
  11. Set up three pans; one with flour, one with the beaten egg and milk mixture and one with the panko or bread crumbs

  12. Remove the chicken from the refrigerator and dredge each piece through the flour, then the egg/milk mixture and finally in the panko/bread crumbs

  13. Heat the butter and olive oil in a skillet over medium heat
  14. Brown the chicken on all sides being careful while turning it not to let the bananas come out of the ends

  15. Place the chicken in an oven safe dish and place in the preheated oven (at 350)

  16. Bake for twenty minutes or until the chicken is just cooked through
  17. While the chicken is baking, put the onions in the skillet where you cooked the chicken
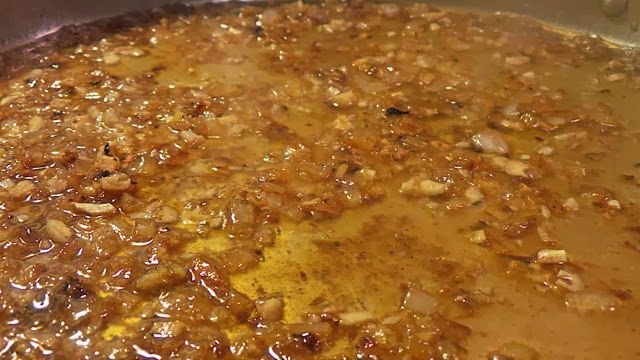
  18. Sauté the onions until they are getting soft
  19. Add the garlic and ginger and sauté for two minutes
  20. Add the wine and reduce by half

  21. Add the chicken broth and the mango/pineapple/juice mixture to the pan along with the can of pineapple chunks and bring to a boil

  22. Reduce the heat to a simmer and cook for ten minutes
  23. Remove the chicken from the oven
  24. Mound some cooked rice in the middle of each plate and top each with a piece of chicken
  25. Spoon the sauce generously over the chicken and rice
  26. Top with a maraschino cherry for a garnish!


If you prefer your sauce a bit sweeter, feel free to add honey or brown sugar during the cooking stage (step 21)


Thursday, February 13, 2014

Sunchoke Soup

Sunchokes can vary in color from pale brown to white, red or
purple (this is the first time I've had ones that weren't white)

Sunchoke - what is a sunchoke?  Would it help if I told you it was the same thing as a Jerusalem artichoke?  No?  I didn't really think so.

They ARE the same thing but if you've never heard of one you've likely never heard of the other. They are actually a root vegetable or tuber that are native to North America and were cultivated by Native Americans long before the Europeans arrived here. They come from a plant that looks very similar (and is related) to the sunflowers we're all used to seeing - and no, even though they're also called a Jerusalem artichoke they aren't from Jerusalem nor are they related to an artichoke.

Now that that's out of the way, what DO they taste like? Well, they LOOK kind of like a knobby pink-skinned ginger root and have a sweet, nutty flavor, reminiscent of water chestnut, though MUCH better than a water chestnut. Oh, and they make one of the best soups I've ever had, there's that part, too.

I first heard of them about ten years ago when one of our local stores used to sell a lot of Melissa's brand products. They had these little bags of them sitting there and I saw them and couldn't figure out what they were. I read the label and decided I had to try them. That started my love affair. When the store stopped carrying them, I went for several years without seeing them. Then about three years ago I ran across them again at a farmer's market in Millerton, NY and have gone back every fall since just to pick up more. I found them again at the winter farmer's market in Coventry about a month ago and this past weekend found them at the farmer's market up in Northampton (if you couldn't tell, we like going to farmer's markets!). I even bought ten pounds last year from a guy on eBay up in Oregon! I guess I'm trying to say that though they're not EASY to find, it's easier than it used to be - and it's well worth the time!

Now, on to the recipe.


Ingredients
Peeled sunchokes

  • 3 shallots - peeled and chopped (or if you're out of shallots like I was this time, try using a large onion instead)
  • 3 cloves - roasted garlic chopped 
  • 2 ribs celery - medium dice 
  • 2 pounds sunflower chokes - peeled and medium diced (just like potatoes, you do NOT have to peel sunchokes as long as they are scrubbed well so if you prefer not to peel them, by all means, don't)
  • 1 quart chicken stock 
  • 1 pint heavy cream 
    Ingredients ready to go in the pan
  • 1 tbsp thyme - chopped (fresh is best but if you don't have it on hand, dried will work just fine)
  • 1 tsp salt 
  • 1 tsp black pepper 
  • 2 tsp canola oil

    Diced sunchokes - they actually look a lot like potatoes at this point

Directions

  1. In a saucepot add oil and shallots (or onions), garlic, and celery and sauté for 2 minutes
  2. Add sunchokes and sauté for 3 minutes
    Sunchokes, celery, shallots and garlic being sautéed
  3. Add chicken stock and bring to a boil
    With added chicken stock
  4. Reduce to a simmer for about 30 minutes or until sunchokes are soft 
  5. Add fresh thyme and blend with a hand blender until completely smooth (alternately, you can pour a small amount at a time into a blender and puree there, repeating as necessary until it's completely blended) 
    Using a hand blender to puree the soup
  6. On low heat, blend in heavy cream and return to a boil
    Add the cream and blend
  7. Season with salt and pepper and serve (add more to taste as needed - and if you use homemade chicken stock like I do you will probably need additional salt)
  8. Serve hot and enjoy!


French Onion Soup (Pressure Cooker Version)

What's for dinner?  French onion soup and a grilled cheese sandwich.  Comfort food!
I've been watching the weather, which I think is something that people are prone to do this time of year here in New England, and I knew that we had yet another snowstorm on the way. That, plus my wife bugging me to do it, made me decide to make a batch of french onion soup.

I'd already made the beef stock earlier in the week so we both knew I'd be making the soup soon but the bad weather sealed it. Since both my wife and son are home today because school was cancelled, that gives me someone to share it with and having a nice hot soup to eat seems to make the storm somehow not QUITE as bad (though I'd take no soup and 70 degree weather anytime).

My wife had also shared the fact that I would be making french onion soup on her blog and that led to requests that I post the recipe, which is why I'm typing this now.

I haven't posted any recipes using the pressure cooker before so I hesitated to post this one but the requests she received made me change my mind. Until a couple of years ago I had never used a pressure cooker myself - but decided I wanted to try it. I received mine as a gift (thanks to my wonderful in-laws!) and it's one of the most useful gifts I've ever had. I typically make some form of stock (usually chicken) at least twice a month. I use it (the stock) in many recipes and if you've ever made chicken soup with homemade stock, you'll never go back to the store bought kind again. It's also invaluable if you like making beans of any kind - the cooking time is cut in half (at least!) which frees up time for doing other things.

In short, if you've never used a pressure cooker, it's a worthwhile investment to make. They're huge time savers, not expensive, and if your concern is safety (who hasn't heard stories about one blowing up and leaving a mess everywhere?), the ones made today are very safe. If you have concerns about that, here is an article you can read all about how safe the newer generation of pressure cookers are.

So, enough about pressure cookers and on to the recipe! The majority of the steps in this recipe are NOT done using the pressure cooker, but since it is used in one of the steps, I'll tell you exactly when you need to put the lid on and seal it - otherwise, the "pan" I refer to is the pressure cooker pan, however it's NOT being used as a pressure cooker unless I mention otherwise.  Because of this, if you don't own a pressure cooker or prefer not to use one, in the one section I'll point out, you could simply cook the mixture NOT under pressure for a longer period of time to achieve the same results.


Sliced onion - this is the amount you should have from about five large onions

If you have a mandoline, it will 
make slicing the onions MUCH
easier. You want them as thin as
possible to cut down on cooking
time which makes it an ideal task
for a mandoline.

Ingredients

  • 1 tbsp butter

  • 1 tbsp olive oil

  • 5 cups yellow onions, thinly sliced (about five large onions)
  • 1 tsp salt
 
  • 1 tsp sugar 
  • 1⁄2 cup of dry white wine

  • 8 cups beef stock 
  • 4 tbsp butter (for roux)
  • 1/4 cup flour
  • 
12 French bread slices – about 3/4” thick, sprayed with olive oil and toasted
. You may want more depending upon how many you like in your soup (or you can use croutons, if you prefer)
  • 
Swiss or gruyere cheese - you want enough slices to cover the bowls of soup later, so the amount depends on how many bowls you'll be having. You can also use either slices or shredded (or if you have a block as I did, you can use a vegetable peeler to slice thinly)

 Directions
  1. Preheat the pressure cooker on medium-low heat, then add the butter, oil and onions
    Onions in the pan and ready to cook
  2. Soften the onions, stirring occasionally in the pan covered with a normal lid or pressure cooker lid (NOT sealed) until the onions become translucent (about 15 minutes)
    Softened onions ready to start browning
  3. Turn the heat to low, remove the lid and add the salt and sugar and stir frequently until the onions have turned a uniform brown (about 20 to 25 minutes)
  4. While doing this (or before if you prefer and simply set aside): in a small, separate pan make the roux by adding the butter and flour and stirring on medium heat until all of the butter has melted and the flour has been fully incorporated. Continue stirring occasionally and watching carefully until it turns a tan color. Turn off the heat and set aside

    Making the roux
  5. Pour the white wine into the pan with the onions to deglaze them. Cook while stirring until the liquid has evaporated, then add the beef stock (if you can use homemade stock, the flavor will be much richer, however store bought will work just fine)
    Browned onions with the wine added and reduced
  6. CLOSE AND LOCK THE PRESSURE COOKER. Turn the heat to high until the pressure cooker has reached HIGH pressure. Turn down the heat and let cook for five minutes (under pressure). When time is up, turn off the heat and either let cool or help it along by putting under running cold water until it's cool enough to open (at this point, I tend to help it along by putting under the running water because the smell is so wonderful I want to eat it sooner rather than later). This is the ONLY step actually using the pressure cooker - so if you prefer NOT to use one, you can simply let it simmer for about an hour instead to achieve the same results.
    After removing the lid of the pressure cooker
  7. Taste and adjust for salt and pepper seasoning (if you used homemade stock, then you will most likely need to add additional salt) then take a ladle of soup and pour it into the pan where you made the roux (the flour and butter mixture)
  8. Whisk together the roux and the soup you just added to it 
    The roux and soup mixture before adding to the pan
  9. Pour the roux/soup mixture into the pressure cooker pan, on medium heat WITHOUT the lid and simmer together for a few minutes
  10. Turn off the heat and pour the soup in bowls
  11. Place the toasted french bread slices (or croutons) on top of the soup then put the slices of cheese (or grated cheese) on top of the bread
    Adding the bread to the soup. This was actually a leftover homemade
    baguette, sliced, painted with olive oil and added herbs, then toasted.
  12. Place bowls on a cookie sheet and put it under the broiler (on low if you can control the broiler temperature) for approximately three minutes or until the cheese has melted and is bubbly
    Slices of swiss cheese added on top of the toasted bread
    Straight out of the oven
  13. Remove from the oven and enjoy!! (be careful, the soup will be VERY hot!)


Sunday, January 26, 2014

Smashed Baby Red Potatoes

The potatoes in the foreground and panini in the background

I believe I may have mentioned before that I love potatoes. For some reason they seem to touch something primal inside of me. When I was a kid, every meal was meat and potatoes and though I still love that combination I don't actually have it that often any more. 

Today we're just as likely to have some form of rice (which I NEVER had growing up) or maybe even noodles as we are to have potatoes - but that doesn't mean I don't love them as much today as I did in the past, I just don't give in to that urge quite as often.

A few months ago I tried something new - well, new to me anyway. My wife loves it and told me I should share my recipe - especially since I made it last night and my daughter (who had never tried it before) seemed to love it as much as the rest of us.

Ingredients


  • 12 small red potatoes (you can use any small potatoes you like - my preference for this recipe is the red potatoes)
  • 2-3 tbsp olive oil (just enough to cover the cookie sheet you'll be using and brushing the tops of the potatoes with later)
  • Kosher salt to taste
  • Black pepper to taste


Optional ingredients


  • Parmesan cheese to taste
  • Rosemary to taste
  • Oregano to taste
  • Garlic powder to taste
  • Onion powder to taste

Use as many of these as you'd like or none of them. Some other herb or spice you like? Use that. You can use either fresh or dried, both work just fine. I like to use dried rosemary and grind it directly over the potatoes.

Directions


  1. Put the potatoes in a pot of water and boil and cook until they are fork tender. For the amount I did, once it was boiling it took about 15 minutes


  2. Drain the potatoes and let cool
  3. Take a cookie sheet and generously drizzle the olive oil onto it. You don't want to be too stingy here - this is what's going to help keep the potatoes from sticking
  4. Place the boiled potatoes on the cookie sheet leaving room between each potato


  5. Using a potato masher, gently press down each potato until it mashes slightly. Rotate the masher 90 degrees and repeat.
  6. Brush the tops of each crushed potato generously with more olive oil (or butter if you want to be really decadent!)


  7. Sprinkle the potatoes with the salt, pepper and herbs of your choice


  8. Bake in a 450 degree oven for 20-25 minutes until golden brown

That's it! Very easy to make and the combination of the crispy exterior and the creamy interior gives it an incredible taste/texture combination! In addition, these are vegetarian and, if you omit the parmesan cheese, they are also vegan!

Panini!!! (chicken or vegetarian). The sun-dried tomato pesto is the secret


Panini.  Flash back about fifteen years and if you mentioned panini to me I'd think you might be talking about a street name in Rome, but I wouldn't have thought of a sandwich.

When I first learned what it was I made them quite a bit, experimenting with all different types of meats, breads, toppings and spreads (see how I did that? nice little rhyme, huh?).

I liked all of them, but only one stuck with the entire family. It uses ciabatta (and really, how can ciabatta be bad in most anything?), chicken breast, baby spinach, fontina cheese, grilled onions and the key to the whole thing: sun-dried tomato pesto. I've come to believe you could put this particular pesto on just about anything and it will make it better.

My middle daughter just turned 22 this week and the tradition in our house is that for your birthday dinner you can name anything you want (well, within reason) and Dad will make it for you. This particular panini is one of her favorites and it's what she wanted for her birthday dinner. Actually, it was about time since I've been wanting to post it anyway but wanted to wait until I had pictures before I did.

VEGETARIAN VERSION!
This is also one of my wife's favorite dishes as well (and she's a vegetarian). Instead of chicken, I simply substitute a Quorn "chicken" patty or TVP (or equivalent). You could do the same or even make it vegan by using a portobello and leaving out the cheese (or making a vegan substitution) and doing the same with the cheese in the pesto.

Pan and weight that I use to make panini if I'm not using my press

I have an actual panini press though I don't usually break it out unless I'm making them for a larger crowd than I did this time. If you have a grill pan (available here), it works every bit as well - you simply need some weight to press down on top of the sandwich. I have one that was made specifically to fit my grill pan but you can easily use a bacon press or, as I've seen some TV chefs do, a brick wrapped in tin foil.  No, it's not fancy, but it works and that's all you really need.

Ingredients*


  • Chicken breast, sliced (or pounded) thin
  • Ciabatta rolls or loaf of ciabatta bread cut into sections
  • Sun-dried tomato pesto (recipe here or buy here)
  • Havarti cheese, sliced thin, available at most delis (by all means use a different cheese if you don't like havarti, but I'd suggest a cheese that melts well)
  • Baby spinach leaves, just enough to cover the sandwich
  • 2 tbsp olive oil (enough for sautéing chicken)
  • 2 tbsp butter (enough for sautéing chicken)
  • 1 tbsp olive oil (enough to cover top and bottom of ciabatta rolls)
* I'm not many giving measurements here simply because it all depends on how many you're making. You want a piece of chicken large enough to cover the ciabatta roll you're using, a slice (or two) of cheese for each sandwich, and enough baby spinach leaves to cover the sandwich. I find that a pound of chicken cut thin will easily make three or four (or more!) sandwiches depending upon how large your rolls are.

Optional ingredients


  • *Seasoning salt (to taste)
  • *Pepper (to taste)
  • *Garlic powder (to taste)
  • *Freshly ground dried rosemary (to taste)
  • *Dried oregano (to taste)
  • Grilled onions
  • 1 cup red or white wine to make wine reduction sauce (which kind is really a matter of preference - for me, it all depends on what we have sitting around that I can use up since I like both!)
*I lightly season the chicken with all of these prior to sautéing - use whatever spices you'd like or none

Directions


  1. Heat butter and olive oil in heavy bottomed skillet (I like to use stainless steel for this) on medium heat
  2. Season chicken (if using seasonings in optional ingredients)

    Sautéing seasoned chicken in butter/olive oil
  3. Sauté chicken in oil/butter mixture until golden brown (3-4 minutes per side, depending upon thickness)
  4. Remove chicken from pan and set aside - repeat as necessary until all chicken is done, not crowding the pan (you may need to add more butter/olive oil to the pan depending upon how many pieces you are cooking)

    Making a wine reduction sauce
  5. If you'd like to make a wine reduction sauce, pour off the excess oil, then pour the cup of wine in the pan. It will sizzle and you can scrape all of the "bits" off the bottom of the pan. Turn up the heat until the wine is boiling and cook until reduced by half

    Ciabatta rolls split in half, ready to go
  6. Split the rolls/loaf in half if not already cut

    My panini "station" with everything I'll need
  7. This is easier if you set up a "station" with all of the ingredients you'll be using close at hand. Start by spreading the sun-dried tomato pesto on both both halves of the ciabatta. I use approximately a tablespoon per side, but that depends on how large your rolls are and how much you want per sandwich

    Both sides spread with pesto
  8. Next, place a slice of cheese on the bottom half of the bread, on top of the spread (you may need to cut/tear the slice of cheese to adjust it to fit the shape of your bread)

    Add the cheese...
  9. Cover the cheese with a layer of baby spinach leaves

    ...and the spinach leaves
  10. Place a piece of chicken on top of the cheese (again, you may have to cut the chicken in order to make it fit the shape of the bread)

    The chicken is next
  11. If using grilled onions (and it makes it taste SO much better if you do!), spread them out and place on top of the chicken

    Then the grilled onions
  12. If you made the wine reduction sauce, pour a tablespoon on the cut side of the top of the roll (over the spread you put on earlier)
  13. Place the top piece of bread on the rest of the sandwich

    Sandwich oiled and ready to go in the pan
  14. If you have a mister, spray the top and bottom of the sandwich with olive oil. If you don't have a mister, simply pour a bit on each side and spread it on with your hand. You don't want to skip this step - the oil is what will help give the panini the nice firm crunch that makes it so good
  15. Preheat your pan (or press). You want to do this for at least five minutes to give it time to get good and hot. If you're going to be cooking them immediately upon making them, you may want to move this step up just a bit so it's preheated when you've finished the sandwich making step
  16. Place the sandwich(s) in the preheated pan and put the weight on top. I typically press it down for at least a few seconds just to help flatten it a bit

    After being flipped once. The one in the front needs to be cooked a bit more.
  17. Cook until the bread is starting to brown on the bottom. I like to have dark grill marks (closer to black), so if you do as well, adjust the cooking time accordingly. It's important not to have the heat too high; if you do, the bread will burn before the interior of the sandwich is hot enough to melt the cheese. I find that a medium heat seems to work well. It's better to err on the side of not quite hot enough - once the interior is hot you can always crank the heat up to brown the bottom of the panini
  18. When the bottom is cooked the way you like it, remove your weight and flip the panini. Cook until the other side is once again turning brown. Done properly, the panini should be hard on top and bottom but soft just under the outer crust


  19. Remove from the pan. If you are cooking several you may want to put them in the oven on warm while you cook the next batch.


  20. Cut on a diagonal, serve and enjoy!


COOKS NOTE: You can do some of these steps ahead of time. I typically make a large batch of the sun-dried tomato pesto ahead of time so I have it whenever I need it. Likewise, you can sauté the chicken early as well so when you're ready to make your panini you simply have to assemble them using your premade pesto and chicken.