Labels

Showing posts with label Barbecue. Show all posts

Sunday, January 28, 2018

Easy Crockpot Ribs


Before I go any further, I need to clarify something.  I have a smoker - multiple smokers actually.  I also have multiple grills.

So, you may (rightfully) ask, why am I cooking ribs in a crockpot?

Excellent question.  There are multiple parts to the answer:
  1. Weather.  Sometimes the weather just doesn't want to cooperate.  I'm not fond of cleaning off the snow to use my outside equipment.  Same holds true with rain.  I'll use the smoker/grill when it's lightly raining but not when it's pouring.
  2. Convenience. There are times when it's just easy to pop the ribs in the crockpot and walk away for awhile. 
  3. The number one reason? I have a cooking blog and I know not everyone is as lucky as me and has a smoker. 
Also, since I have a small BBQ sauce company on the side, I'm frequently asked by customers how they can make ribs to use our sauces and rubs WITHOUT a smoker.

This is one way to do it.  I know there are several recipes out there.  Some use root beer, some use Dr. Pepper, yet others use fruit jams.  This one uses apple juice.  Oh yeah, and BBQ sauce.

Of course, I'd love you to use my BBQ sauce, but the truth is that any sauce you like will work.  If you should want to try our sauce, you can find it here.

And for the inevitable question, do they taste as good as using a smoker?  In my opinion, no.  BUT (and it's a huge but) you can make them without having to invest in an expensive piece of equipment you may have no interest in or no place to put.  They also have the advantage of being very good, simply without the added smoke flavor.

Now, on to the recipe.


Ingredients

  • 1 rack pork ribs (2-3 pounds)
  • 2-3 tbsp rub* (I use my Pork and Poultry Rub, but any rub you like will work.)
  • 1 cup apple juice
  • 1 1/2 cup BBQ sauce (For this, I used our Sweet and Mild sauce.  We have 11 sauces available ranging from mild to very hot.  You can use any sauce you like and it will work fine.)
*If you prefer, you can use salt and pepper instead of a rub.  Simply sprinkle however much you'd like on both sides of the ribs in place of the rub.

Directions

  1. Turn the broiler on in your oven to preheat.  
  2. Ribs frequently have a membrane on one side.  You can choose to leave this on if you'd like, but I always remove it.  It helps the rub to penetrate the meat and gives a better flavor.  To remove it, the best way is to grab one edge of it and simply pull it off.  It can be difficult to grab but it's much easier if you use a paper towel.  If you make a lot of ribs, you can actually purchase a tool that will make the job of removing the membrane much easier.

    Membrane on the ribs
    Tool for removing membrane.  Grabbing with a paper towel works just fine.
  3. After you remove the membrane you can trim the ribs if you choose.  There will be no difference in taste either way.

    Ribs trimmed and ready to be rubbed.  Trimming is NOT necessary
    The meat that was trimmed off is above and to the right and will also be cooked
  4. After you trim the ribs (optional), you are ready to use your rub.  Simply sprinkle a fairly heavy coating on both sides of the ribs and rub it into the meat.  If you prefer to use salt and pepper instead, do the same thing with it.


  5. Put the ribs on a lipped pan.  You can use a sheet of parchment paper or foil to line it to facilitate cleanup if you'd like.
  6. Put the pan in the preheated oven for five minutes.
  7. Flip the ribs over for an additional five minutes.


  8. If you use a crockpot liner, this is the time to put it in.  If you'd like to try one, you can find them here
  9. Pour the apple juice in the crockpot (with or without the liner).
  10. Remove the ribs from the oven.
  11. Put the ribs in the crockpot with the apple juice. You may have to cut the ribs for them to fit, depending upon the size of your crockpot.
  12. Pour one cup of BBQ sauce over the ribs.


  13. Cover the ribs and cook on HIGH setting for four hours.  You can cook them for 6-8 hours on low if you prefer.  If you do, the texture of the meat will become somewhat "mushy" though the taste will be the same.
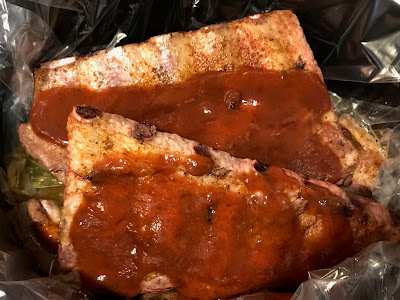

    Ready to come out of crockpot
  14. After the four hours is up, carefully remove the ribs and place on a lipped pan.
  15. Turn the oven to 350.
  16. Using the 1/2 cup of BBQ sauce you have left, spread it over both sides of the ribs.


  17. Put the ribs in the oven for about 15-20 minutes.  This will "tighten" up the sauce and give them a wonderful flavor and a better appearance.


  18. Remove the ribs from the oven and serve.

Sunday, May 17, 2015

Hawaiian Luau in the Smoker!!

Okay, okay, I know I haven't posted in a long time.  It's just a case of life getting in the way (new house, new job, etc.) but I'm going to get better.  I promise.  Well, at least until the next time life gets in the way again...

But I digress!  I'm writing this particular recipe up because I don't think anyone should have to miss trying this at least once in their lives (well, except for vegetarian/vegans - this is pretty much a meatfest, so you're completely off the hook for reading this one).

A friend of mine tagged me on Facebook the other day with a picture of something that looked amazing - there wasn't much in the way of directions, but I can deal with that (I'm pretty good at making stuff up on the fly).

It was basically pork ribs, inside a hollowed out pineapple, wrapped in bacon - and then put on the smoker.

I know some folks are probably thinking that it doesn't sound so good - but pork and pineapple go REALLY well together (think of a Hawaiian luau).  If you brine the pork first and use a great rub (Mac Brothers Pork and Poultry Rub - hint, hint), it's even better!

As great as it sounded to me, I decided I also wanted to try basically the same thing with kielbasa inside instead of the ribs (I'd LOVE to try both together, but I'd have to find a MUCH bigger pineapple first!) - so of course, I made two so that I could try each one.

So, here it is.  If you decide to try it, please let me know what you think!
Pineapple, stuffed with kielbasa, wrapped in bacon, smoked and ready to eat!

Ingredients

  • whole pineapple
  • boneless pork country style ribs (I had two pounds - just over half of a pound fit inside the pineapple so I cooked the rest by themselves in the smoker
OR
  •  kielbasa (I was able to fit about a half pound inside the pineapple)
  • 1/2 tbsp olive oil (enough to coat ribs, if you're using them - not necessary for kielbasa)
  • Mac Brothers Pork and Poultry Rub (Regular or Spicy, depending upon preferences)*
  • Brine (recipe below)
  • 1/2 pound bacon
*NOTE: Any rub you like will work.  I don't list the amount of rub here simply because you're going to sprinkle the rub liberally on the pork and the outside of the pineapple. It won't take much at all if you're only using what you can fit inside the pineapple - a bit more if you're smoking extra ribs at the same time.

Brine**
  • 4 cups water
  • 2 cups apple cider
  • 1/2 cup maple syrup
  • 1/4 cup salt
**NOTE: This recipe makes enough brine that you could actually do twice the number of ribs in this recipe.

Directions

  1. If you're NOT using ribs and using only kielbasa, skip directly to number 8.
  2. Mix together the brine ingredients, being certain that the salt has dissolved (I typically use half hot water and dissolve the salt in that, then add the other half as ice water)
  3. Add the ribs to the brine
  4. Let sit in the refrigerator for at least four hours, up to overnight
    Ribs in the brine and kielbasa
  5. Remove the ribs from the brine and pat dry, then place on a large pan
  6. Pour olive oil on all sides of ribs and rub in to coat
  7. Sprinkle rub liberally over the surface of ribs (both sides - see picture for an idea of how it should look); make certain you cover all surfaces of the ribs with the rub (remember to remove the bones!)
    Ribs, after using rub
  8. Set the ribs aside
  9. Cut the top and bottom off of the pineapple
  10. Place the pineapple, bottom down, on the cutting board. Using a fairly thin knife (I use a meat slicer), carefully cut out and remove the core of the pineapple (if you have a pineapple corer, use that).  You will want to leave a whole big enough for the meat
    Top and bottom sliced from the pineapple and cored
  11. Carefully cut off the rough sides of the pineapple, leaving the fruit exposed all around
    Rough sides of pineapple removed
  12. Trim any necessary "bits" off of the sides and through the middle of the pineapple then set it back on it's bottom 
  13. Take strips of the ribs (or kielbasa) and carefully poke them all the way through the hole so they are just barely coming out each side (when I did this with the ribs, the pineapple "broke". I took some cooking twine and simply tied it back together)
    The ribs stuffed inside pineapple (and tied together after it broke; I had
    better luck with the kielbasa - no pineapple breakage!
  14. One at a time, wrap the pieces of bacon around the pineapple. In order to make it stay where I wanted it, I inserted toothpicks to hold it together at the end
  15. Overlap the pieces of bacon and continue wrapping until the entire pineapple is covered
  16. Generously sprinkle the outside of the bacon (the pineapple) with rub until the entire surface is coated
    Both pineapples with bacon wrapped around them and rub on them, ready to go in the smoker
  17. Place the pineapple in the smoker at a temperature of about 225. (mine took almost six hours - until the internal temperature reached 170)
    The smoker is fired up and ready to go!  I use a thermometer with probes
    so I can monitor the temperature as it cooks
  18. Carefully remove the pineapple from the smoker, let stand for about ten minutes, then slice and enjoy!
    The pineapple with the kielbasa stuffed in it
    The pineapple with the ribs stuffed in it

Monday, September 1, 2014

BBQ Pork Chops


Now that we're selling our BBQ sauce and rubs at the farmer's market every week, there are several questions I seem to get with regularity.

One of them is: exactly HOW do I cook pork chops on the grill? For those of you that do it regularly, it may seem like an easy question, but if it's something you've never tried, it may not be quite so simple.

Well, I'm here to help.

I'm certain there are MANY different ways to do it, including using things like Italian dressing, etc. Since we're there to sell BBQ sauce and rubs, I think the answer they are looking for is more in line with how to cook and BBQ on the grill, so that's the one I'm going to try to answer.

My first piece of advice is this: brine your pork.

Do you have to? Of course not.

Should you? I feel the answer is a resounding yes.

I had never brined anything until a few years ago but I'm now a HUGE believer in it, particularly for pork and poultry.  As a matter of fact, I'm such a believer in it now that we make and sell our own brine.  It's called "Not Just For Turkey" and it's amazing for any form of pork and poultry.
Bone-in chops are my favorite, but I can't always find the thick ones I prefer.
This is from dinner a couple of weeks ago after a visit to the local butcher shop.

Today's pork has very little fat in it and because of this, it's way too easy to overcook and dry it out - that's why brining is your friend. There are lots of different brines out there; if you don't believe me, do a quick search for it. To paraphrase my grandmother, there are more brine recipes than you can shake a stick at (though I never quite understood why you'd want to shake a stick at all the things I heard that saying used for).

Brining is NOT difficult - quite the contrary. I'm sure you can find some very complicated brines in that search that you just did, but it's really not necessary. The one I use is the aforementioned "Not Just For Turkey".  The directions are on the package, but essentially, you use 1 tbsp of the brine mix with 1 cup of liquid (water, apple cider, wine, etc.). 

A common misconception about brining is that it makes things salty: WRONG!! Yes, there is salt in the brine, but it doesn't make it taste salty - at all.

One other tip: keep in mind that if it's too hot, rainy, snowy, or cold outside or if you simply don't have a grill you can use a grill pan on the stove top for this and it will come out just fine. You'll get the same grill marks and for the most part, the same flavor (some people debate whether or not the open fire on a grill actually adds any flavor - I tend to think it does but wouldn't argue with those that feel the opposite).

Ingredients

  • 6 pork chops (my preference is 1 1/2 inch thick, bone-in pork chops. I can't always find them - including for pictures today - so whatever kind you like or can find is fine. Simply adjust cooking time based on the thickness of your pork chops)
  • 1 tbsp olive oil (enough to coat both sides of chops)
  • Grandpa's Best Butter My Butt & Call Me a Biscuit Pork and Poultry Rub 
  • Grandpa's Best Not Just For TurkeyBrine 
  • Grandpa's Best BBQ Sauce (any variety)

*NOTE: I don't list the amount of rub here simply because you're going to sprinkle the rub liberally on the pork and it's going to depend on the size and number of pork chops you're using.

Directions

  1. Make the brine.  Mix together enough brine mix to cover the chops at a ratio of 1 tbsp brine mix plus 1 cup of your choice of liquid (apple juice/cider works very well with pork, but plain water also works well).  
  2. Add the pork chops to the brine
    Brined chops
  3. Let sit in the refrigerator for at least four hours, up to overnight
  4. Remove the chops from the brine and pat dry, then place on a large pan
  5. Pour olive oil on both sides of chops and rub in to coat
  6. Sprinkle rub liberally over the surface of chops (both sides - see picture for an idea of how it should look); make certain you cover all surfaces of the chops with the rub
    Apply the rub liberally, then rub into the chops
  7. Place all of the chops on a preheated grill.  I heat mine to about 400 degrees
    Put sauce on the pork chops after placing on the grill
  8. Using a grill brush, spread BBQ sauce on the top of the chops
  9. Close grill and cook for about seven minutes for 1 1/2 inch chops. If yours are thinner, adjust cooking time as necessary
    If you want diamond pattern grill marks, simply turn chops
    45 degrees about halfway through the cooking time for each side
  10. Turn over and again spread sauce on top of the chops
  11. Close grill and cook for another seven minutes
  12. Remove from grill - I typically put a bit more sauce on the last side that was cooked right after removing from the grill (keep in mind, the USDA minimum safe temperature for pork is 145 degrees)
    Let the chops sit for about five minutes after removing from the grill
  13. Let rest for about five minutes
  14. Enjoy!
    Simple and hard to beat!
Let me know what you think in the comments if you try this!!

Monday, July 28, 2014

Vegetable Fajitas - and they're vegan!


We enjoy Mexican food in our home (well, at least what we in the U.S. call Mexican food).  One of our favorites happens to be fajitas. You can obviously make them with beef, pork or chicken, but you can also make them with no meat at all, just vegetables.

Since my wife has become vegetarian, I've been trying to cook a lot more vegetarian/vegan dishes. This one can be either but is primarily vegan (the only thing that's not vegan in it is the cheese and sour cream at the end which can easily be omitted or vegan substitutes used).
Some of the ingredients with Mac Brothers Beef Rub in the foreground

In this recipe, the only spice I'm using is Mac Brothers Beef Rub (or Spicy Beef Rub if you prefer). You could certainly use other spices, such as chili powder, cumin, etc. but the flavor you'll get out of using our rub is fantastic.

If you are cooking for vegetarian and non-vegetarian folks you can satisfy both with this recipe - simply follow as is for the non-meat eaters, and cut up some chicken, pork, or beef (or use shrimp) and sauté separately to add for those that would like it.

So, enough with the commentary, on to the recipe!

Ingredients*
Cut the onion into sections


  • 2 small zucchini, julienned
  • 2 small yellow squash, julienned
  • 1 tbsp kosher salt
  • 1 medium onion, sectioned
  • 4 medium cloves garlic, minced
  • 8 oz portobello mushrooms, sliced
  • 1 red pepper, cut into strips 
  • 3 tbsp Mac Brothers Mild Beef Rub (or Really Frickin' Hot Beef Rub), more or less to taste
  • 1 package multigrain tortillas (or flour or wheat tortillas)
  • 2 tbsp olive oil
    Julienned zucchini and squash


Optional

  • Cheese 
  • Sour cream


*These are the vegetables I used - any vegetables you happen to have on hand will work. If you don't have (or don't like) peppers, use something else, likewise the same is true of all of the rest of the vegetables.

Directions


  1. Put the julienned zucchini and squash in a colander
    Zucchini and squash with kosher salt mixed in
  2. Sprinkle the kosher salt over the zucchini and squash and mix together
    After sitting for about 40 minutes.  If you look closely you
    can see water beaded on the surface of the vegetables
  3. Let sit for a minimum of 20 minutes, up to an hour. This is to draw as much of the water as possible out of the zucchini and squash (while I'm waiting for the salt to work its magic, I actually do the rest of the prep; cutting the onion, garlic, mushrooms, peppers, etc.)
    After squeezing the excess water out of the zucchini/squash. This is necessary or you
    will have waterlogged fajitas.  The volume of vegetables will reduce by about half.
  4. After letting the salt sit with the zucchini/squash in the colander, much of the water will be drawn out but there will still be a lot in the vegetables. In order to get it out, you need to squeeze the water out by hand. You can use cheesecloth for this, but I just use my hands and squeeze it in batches as hard as I can which removes a huge amount of water. After this process, you will notice that the volume has been reduced by about half
  5. Heat one tbsp of olive oil in a heavy skillet over medium heat (I prefer to use cast iron for this)
    Sauté the onions until they get soft
  6. Add the onion and cook until pieces separate and they are just getting soft (about five minutes), stirring frequently
    Onions, peppers and mushrooms being sautéed 
  7. Add the peppers and mushrooms and stir frequently
  8. Cook until peppers and mushrooms are getting soft and starting to give up their juices (about five to seven minutes), stirring frequently
    Add the rub to the onion, pepper, mushroom mix
  9. Add one tbsp of the Beef Rub and mix well
  10. Remove onions, peppers, and mushrooms from the pan
  11. Add last tbsp of olive oil to the pan, then add the minced garlic and cook for about 30 seconds or until garlic is fragrant
    The zucchini/squash mixture with the rub added
  12. Add zucchini and squash to the skillet
  13. Add one tbsp of Rub and mix well. Continue cooking, stirring frequently for about 3 - 4 minutes
    Add the onions/pepper/mushroom mix back into the zucchini/squash
  14. Add onions/pepper/mushroom mix to the zucchini/squash and mix well
  15. Add the final tbsp of Rub. Add additional rub to taste
  16. Heat tortillas according to directions on package
    Tortilla with fajita mixture added, topped
    with sour cream and cheese (optional)
  17. Serve with cheese and sour cream (optional) and enjoy!


Sunday, July 27, 2014

Easy BBQ Chicken


It seems like everyone has their own way to make BBQ chicken - but I've had a LOT of people ask me about the best way to do it.  I'm sure it has something to do with the fact that we make and sell our own sauces and rubs but this is actually a question I've been getting for far longer than we've been doing that.

From what most people tell me, the most common problem seems to be that they burn the outside of their chicken while the inside is still not done. And there aren't many things less appetizing than biting into what looks like a delicious piece of chicken and then finding that it's still pink (or red!) in the middle.

I'm going to tell you how to avoid that - or at least how I avoid it. I remember both my grandfather and my mother doing this as far back as I CAN remember. Of course, they didn't use our rub, since we just developed that particular product. What we used instead of rub was a mixture of sugar and chili powder sprinkled on the chicken (if you want to try this, it IS good - simply not as good as the rub) mixed until it resembled the traditional cinnamon/sugar mixture most people are familiar with.

The other nice part about this is that you can still have "grilled" chicken without the grill if it's too hot, rainy, snowy, or cold outside or if you simply don't have a grill. Instead of cooking for the last few minutes on your grill, just use a preheated cast iron grill pan. You'll get the same grill marks and for the most part, the same flavor (some people debate whether or not the open fire on a grill actually adds any flavor - I tend to think it does but wouldn't argue with those that feel the opposite).

Brining is NOT difficult - quite the contrary. I'm sure you can find some very complicated brines in that search that you just did, but it's really not necessary. The one I use is called "Not Just For Turkey".  The directions are on the package, but essentially, you use 1 tbsp of the brine mix with 1 cup of liquid (water, apple cider, wine, etc.). 

A common misconception about brining is that it makes things salty: WRONG!! Yes, there is salt in the brine, but it doesn't make it taste salty - at all.

So, without further ado, here it is:

Ingredients

  • 1 whole fryer chicken, cut up (alternatively, feel free to use "pre-cut" chicken parts if you prefer)
  • Grandpa's Best Butter My Butt & Call Me a Biscuit Pork and Poultry Rub *
  • Grandpa's Best Not Just For Turkey Brine *
  • Grandpa's Best BBQ Sauce (any variety)

*NOTE:  I don't list the amount of rub here simply because you're going to sprinkle the rub liberally on the chicken and it's going to depend on the size and number of the pieces of chicken you're using.  Similarly, the amount of brine mix you will use will depend on the size of the container you're using.  You need to make enough to cover the chicken.

Chicken in the brine solution

Directions

  1. Make the brine.  Mix together enough brine mix to cover the chicken at a ratio of 1 tbsp brine mix plus 1 cup of your choice of liquid
  2. Add the cut up chicken to the brine
  3. Let sit in the refrigerator overnight
  4. Preheat oven to 350
  5. Remove the pieces from the brine and pat dry, then place in a large pan
    Rub on one side of the chicken - one piece
    not touched so you can see the difference.
    Remember to flip it and cover both sides!
  6. Sprinkle rub liberally over the surface of the chicken (see picture for an idea of how it should look); make certain you cover all surfaces of the chicken with the rub
  7. Be certain the pan is large enough that the pieces of chicken aren't too crowded - if they are, it will greatly extend the cooking time)
    Chicken with rub on both sides, ready to go in the oven
  8. Cover and bake until the internal temperature of the thickest part of the chicken reaches a minimum of 150 degrees (that's not quite a safe temperature to eat yet, but it will continue to cook for a few minutes after removing and you will be finishing it off on the grill)
    Straight out of the oven and ready for the grill
  9. Remove from the oven - at this point, you can set it to the side until you're ready to put it on the grill
    On the grill, ready to add sauce
  10. Place all of the chicken on a preheated grill.  I heat mine to about 400 degrees
  11. Using a grill brush, spread BBQ sauce on the top of the chicken
  12. Close grill and cook for about five minutes
    After flipping once on the grill and adding sauce
  13. Turn chicken over and again spread sauce on top of the chicken
  14. Close grill and cook for about five minutes
    This has been on the grill for about ten minutes and is ready to be removed
  15. Remove from grill - I typically put a bit more sauce on the last side that was cooked right after removing from the grill (keep in mind, the USDA minimum safe temperature for chicken is 165 degrees)
  16. Enjoy!

The nice thing about employing this method is that your chicken is going to be some of the moistest, juiciest BBQ chicken you've ever had! Some people like to parboil their chicken, but that makes the meat have a rubbery texture and loses the flavor - parBAKING with a rub is the best way!

Let me know what you think in the comments if you try this!!